


MF-03
Easy & Fast to install on your wall
✅ Download Installation Manual
MF-04
Easy & Fast to install on your wall
✅ Download Installation Manual
MF-05
Easy & Fast to install on your wall
✅ Download Installation Manual
Before You Buy
Do I need a professional installer?
No. Most customers can complete installation themselves with basic tools.
What are the wall requirements for installation?
Brick or cement walls: Use expansion bolts to anchor it directly.
Stud walls (non-brick/cement walls): You may need to find the position of stud and install it on the stud. Use M7 screws attached.
For extra reinforcement on stud walls: Attach stringers (more than 24 inch width) to the studs with bolts, then mount equipment to the stringer.
Will installation damage my wall?
Yes, drilling holes is required because VIMEXCITER is designed for heavy-duty training. We recommend confirming your wall type before installation.
Are professional tools required for assembly? Do you offer in-home installation services?
Yes, all necessary mounting hardware is included.You simply need to provide a power drill (3/8" bit required). and tape measure .We advise using safety equipment like gloves and goggles during assembly. Currently, professional on-site installation is not available.
How long does installation take?
For most users, we recommend setting aside 30-45 minutes. If you have a friend to help, it will be faster. Please ensure you have enough time and do not rush the process.
My wall studs are 16 inches apart. Do I need extra materials for installation?
Yes,For maximum stability on standard 16-inch stud spacing, using a mounting board is required. Secure a piece of 3/4" plywood or solid lumber horizontally across at least two studs. Then, mount the MF-03 frame onto this board. This creates a solid foundation that handles heavy dynamic loads better than direct stud mounting alone.
How do I choose the right installation location based on the product dimensions?
To ensure a smooth installation and a safe workout experience, please evaluate your space in three dimensions. We recommend adding a safety buffer (redundancy)to the product's footprint:
- Width (Side Clearance):
Don't just measure the machine's width. You need extra space on both sides for installation tools (like drills). More importantly, allow enough room so your arms or the bar won't hit the side walls during wide-grip exercises. - Depth (Front Clearance):
Measure the open floor space in front of the wall. Ensure there is enough depth to perform full-range movements (like lunges or rows) without hitting any furniture or obstacles in front of you. - Height (Vertical Clearance):
Check your ceiling height. Besides the mounting height, ensure there is enough vertical space above the unit for overhead movements and to avoid interference with ceiling lights or fans.
Pro Tip:Always measure your room's clear space(excluding baseboards or moldings) and compare it with the product's dimensions plus your desired buffer zone.
Can I move the location after installation?
Yes. If you need to change the location, simply unscrew the screws and fill the holes in the wall. You can then drill and fix it in the new location just like the first installation.
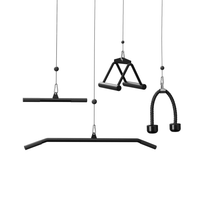
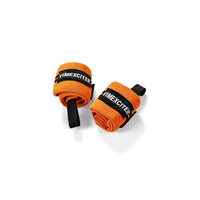
Are the resistance bands and hooks included?
Yes, these accessories are included with the machine. If you need replacements in the future, they can be purchased separately.
Can I return the product if it doesn't fit?
Yes, we offer a 30-day return policy. However, please keep in mind that returning the product is a hassle, and the drill holes left in your wall are permanent. Therefore, if you are unsure about compatibility before purchasing, please email us first to confirm your installation location.
Contact Us
Still Have Installation Questions?
Every home setup is unique. If you get stuck or feel unsure during installation, simply snap a photo or record a short video of the issue and email it to us.Our team will review it and provide a specific solution right away. We're here to help you get set up smoothly!
Call us: 1(646)295-2328
Email address: support@vimexciter.com
Address:30 N Gould St Ste N, Sheridan, WY 82801
Opening Hours: Mon-Fri, 9:00 am-6:00 pm MST